
Blog / Integrations
How to add a notification banner or popup to your website
A product's ability to capture the user's attention is crucial, and dynamic prompts/notification is one such efficient way to engage users. This article will guide you step by step to build your own Dynamic Prompts/Notifications bar.

Pratham Agrawal
A product's ability to capture the user's attention is crucial, and dynamic prompts/notification is one such efficient way to engage users.✨
It allows you to communicate with users by directing their attention to the navigation bar and can be used for a variety of purposes, such as for announcing business news, showing off the best features, generating leads, and so on.
This article will guide you step by step to build your own Dynamic Prompts/Notifications bar. 👩💻
We used React for the frontend, Canonic for the Part backend.
Let's begin! 📌
📝Step 1: Create-react-app
Lets start with creating a new react project - Use create-react-app
npx create-react-app dynamic-notifications
Next, to create a basic skeleton, just edit src/App.js
import React from "react";
import "./App.css";

function App() {
  return (
    <div className="app">
      <section className="app-body">
        <h3>Dynamic popups and notifications</h3>
        <p>These notifications come from the data stored on your Canonic app</p>
      </section>
    </div>
  );
}

export default App;
✨Step 2: Add some styling
Once you're done with the basic skeleton, it's time to add some styling to it. To add the styling use - Edit src/App.css
body {
  margin: 0;
  height: 100vh;
  overflow: hidden;
  font-family: sans-serif;
  -webkit-font-smoothing: antialiased;
  -moz-osx-font-smoothing: grayscale;
}

h3 {
  font-size: calc(10px + 2vmin);
  margin-bottom: 8px;
}

.app {
  text-align: center;
}

.app-body {
  background-color: #020d57;
  min-height: 100vh;
  display: flex;
  flex-direction: column;
  align-items: center;
  justify-content: center;
  color: white;
  overflow: hidden;
}

.app-body p {
  font-size: calc(2px + 2vmin);
  margin: 0;
  opacity: 0.5;
}
After completing the steps above, run npm start and you should have something similar to this👇

🔔Step 3: Add the Notification details
Now it's time to add the notification and some basic styles, add the HTML to src/App.js
...
<div className="app">
	**<header className="app-notification"> 🚀 This is a notification </header>**
	<section className="app-body">
...
✨Step 4: Make it look nice!
Let's add some styling to app, edit src/App.css
...

.app-notification {
  position: absolute;
  background-color: #4760ff;
  padding: 8px;
  width: 100%;
  color: #fff;
}

.app-notification p {
  font-size: 14px;
  font-weight: 600;
  margin: 0;
}

...
Once done with the stated steps, this is how it should look: 👇

👩🔧Step 5: Let's make it dynamic
Let's move ahead and make it dynamic.
Here, we want to show a different popup based on certain criteria. However, if we do it on the front end, the logic can easily be exposed. Thus, let’s rather create an API where the logic is computed on the backend, using Canonic.
Clone this project and head on to the CMS to create a few notifications.

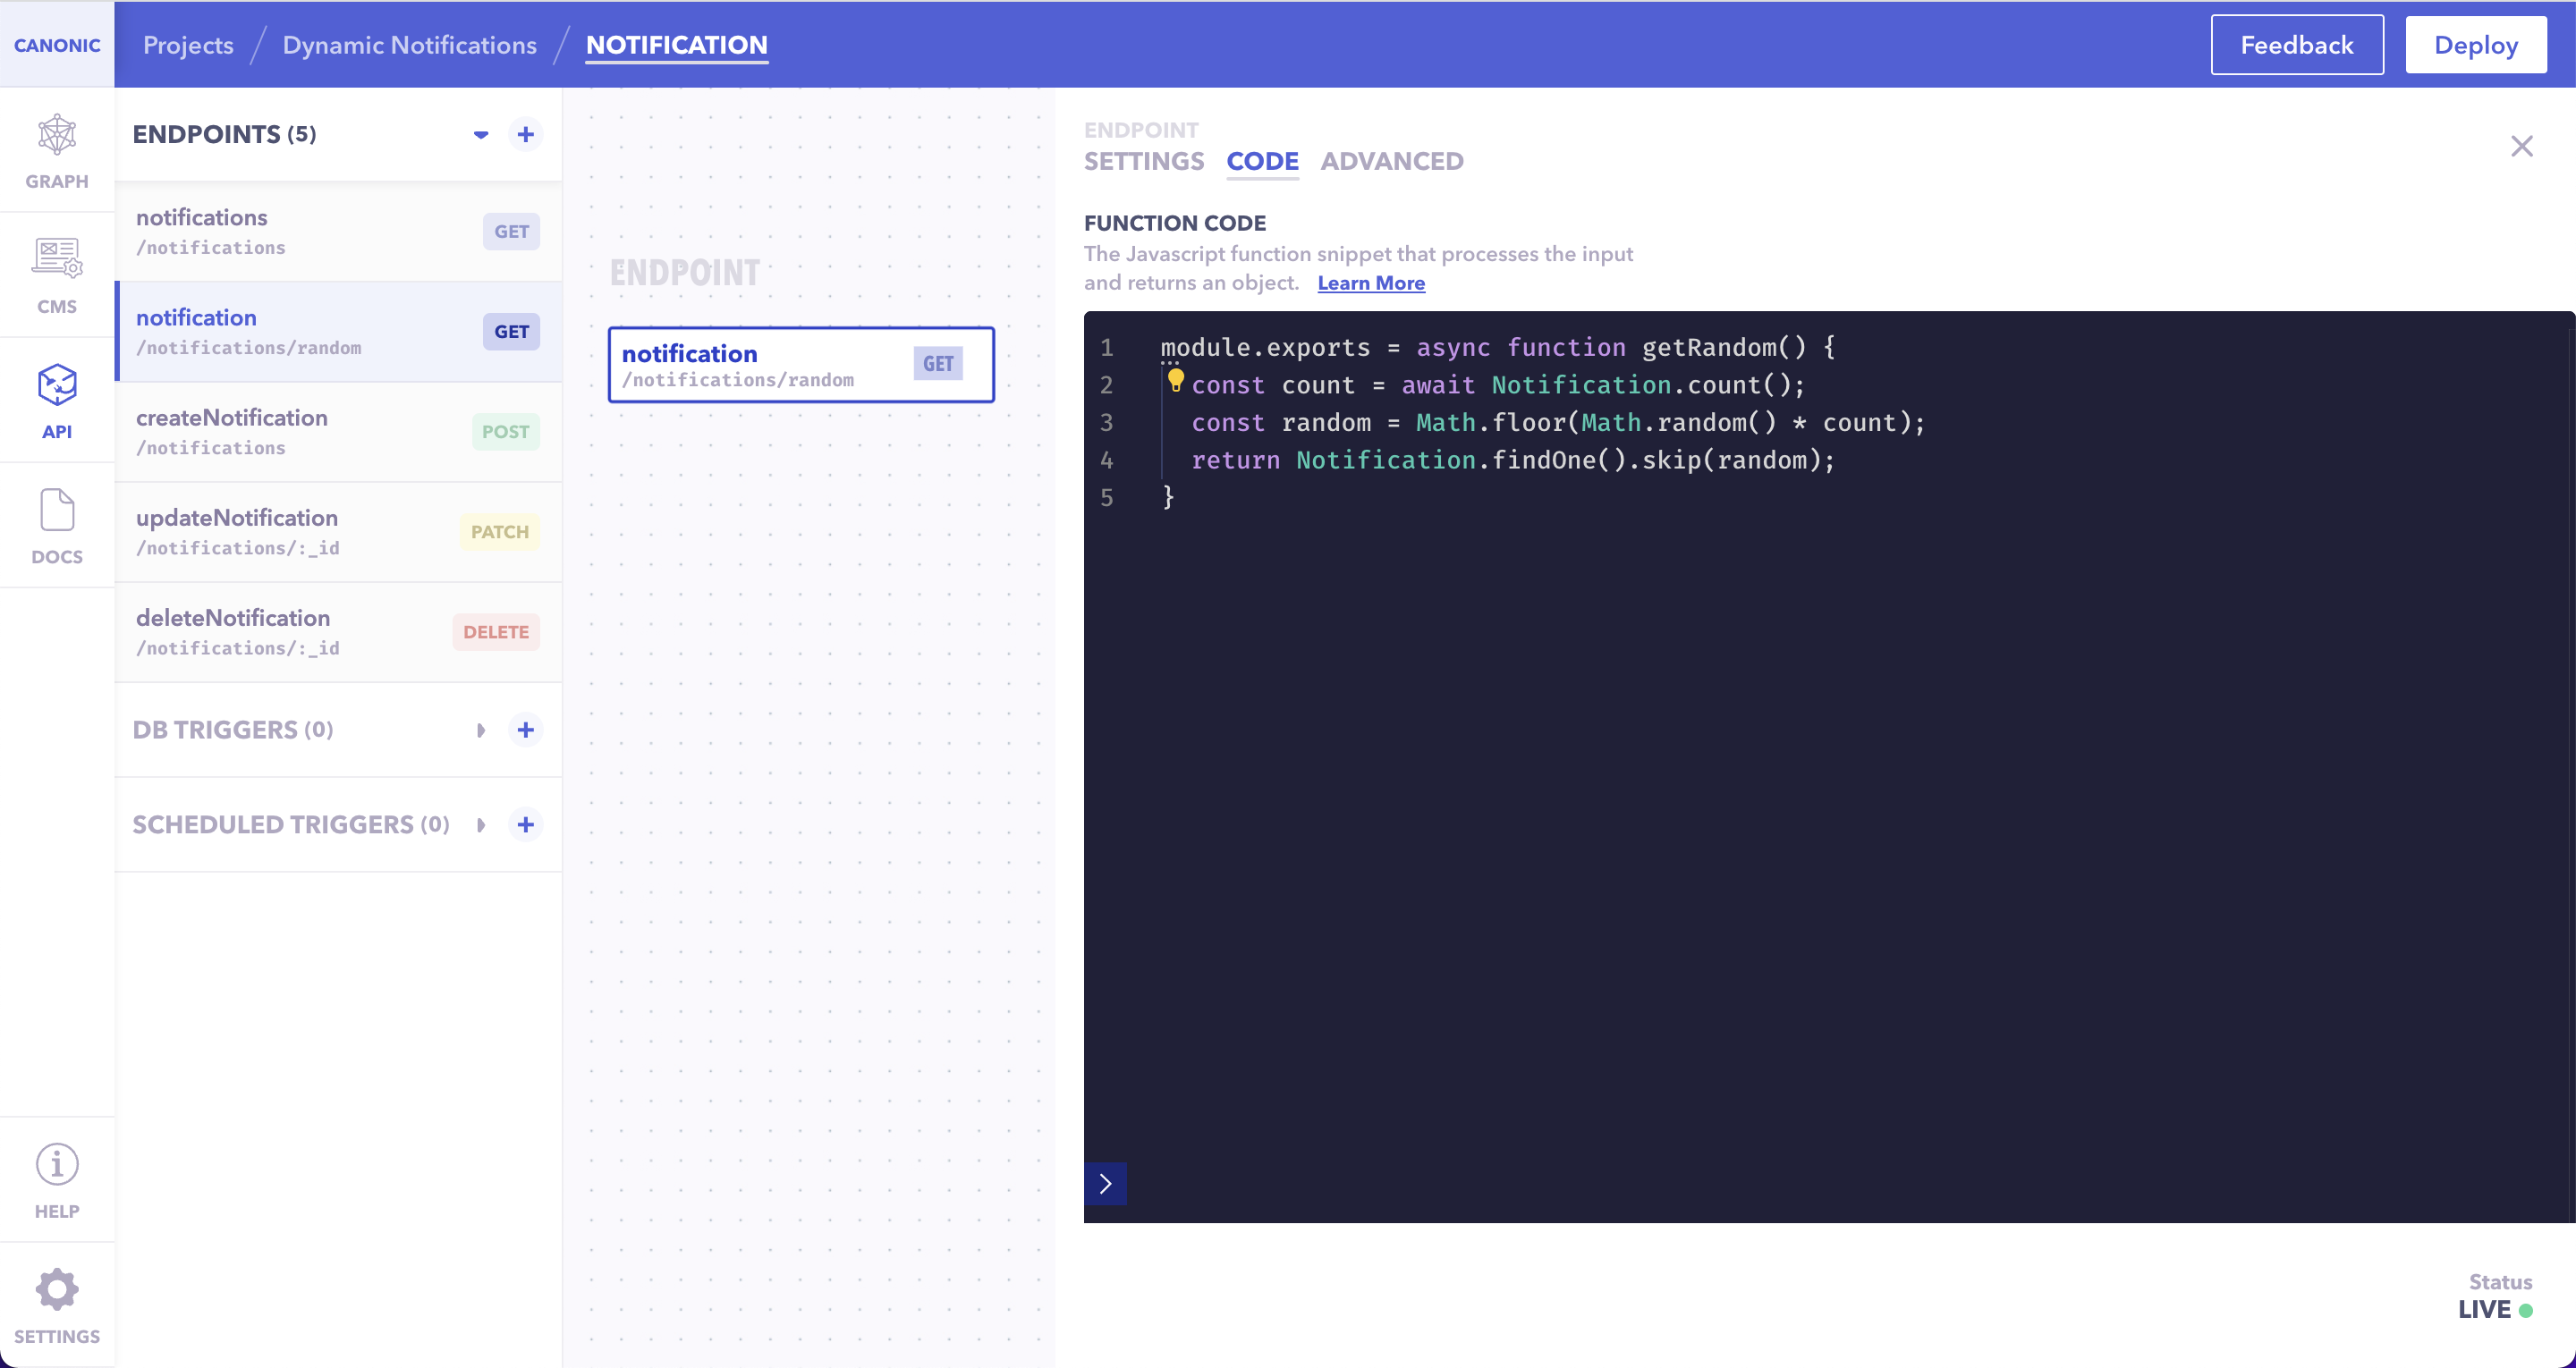
🚀Step 6: Create custom API
Once done, head on to the API section and create an API to return random notifications.

Put the below code into the code section to return random notifications from the database.
module.exports = async function getRandom() {
  const count = await Notification.count();
  const random = Math.floor(Math.random() * count);
  return Notification.findOne().skip(random);
}
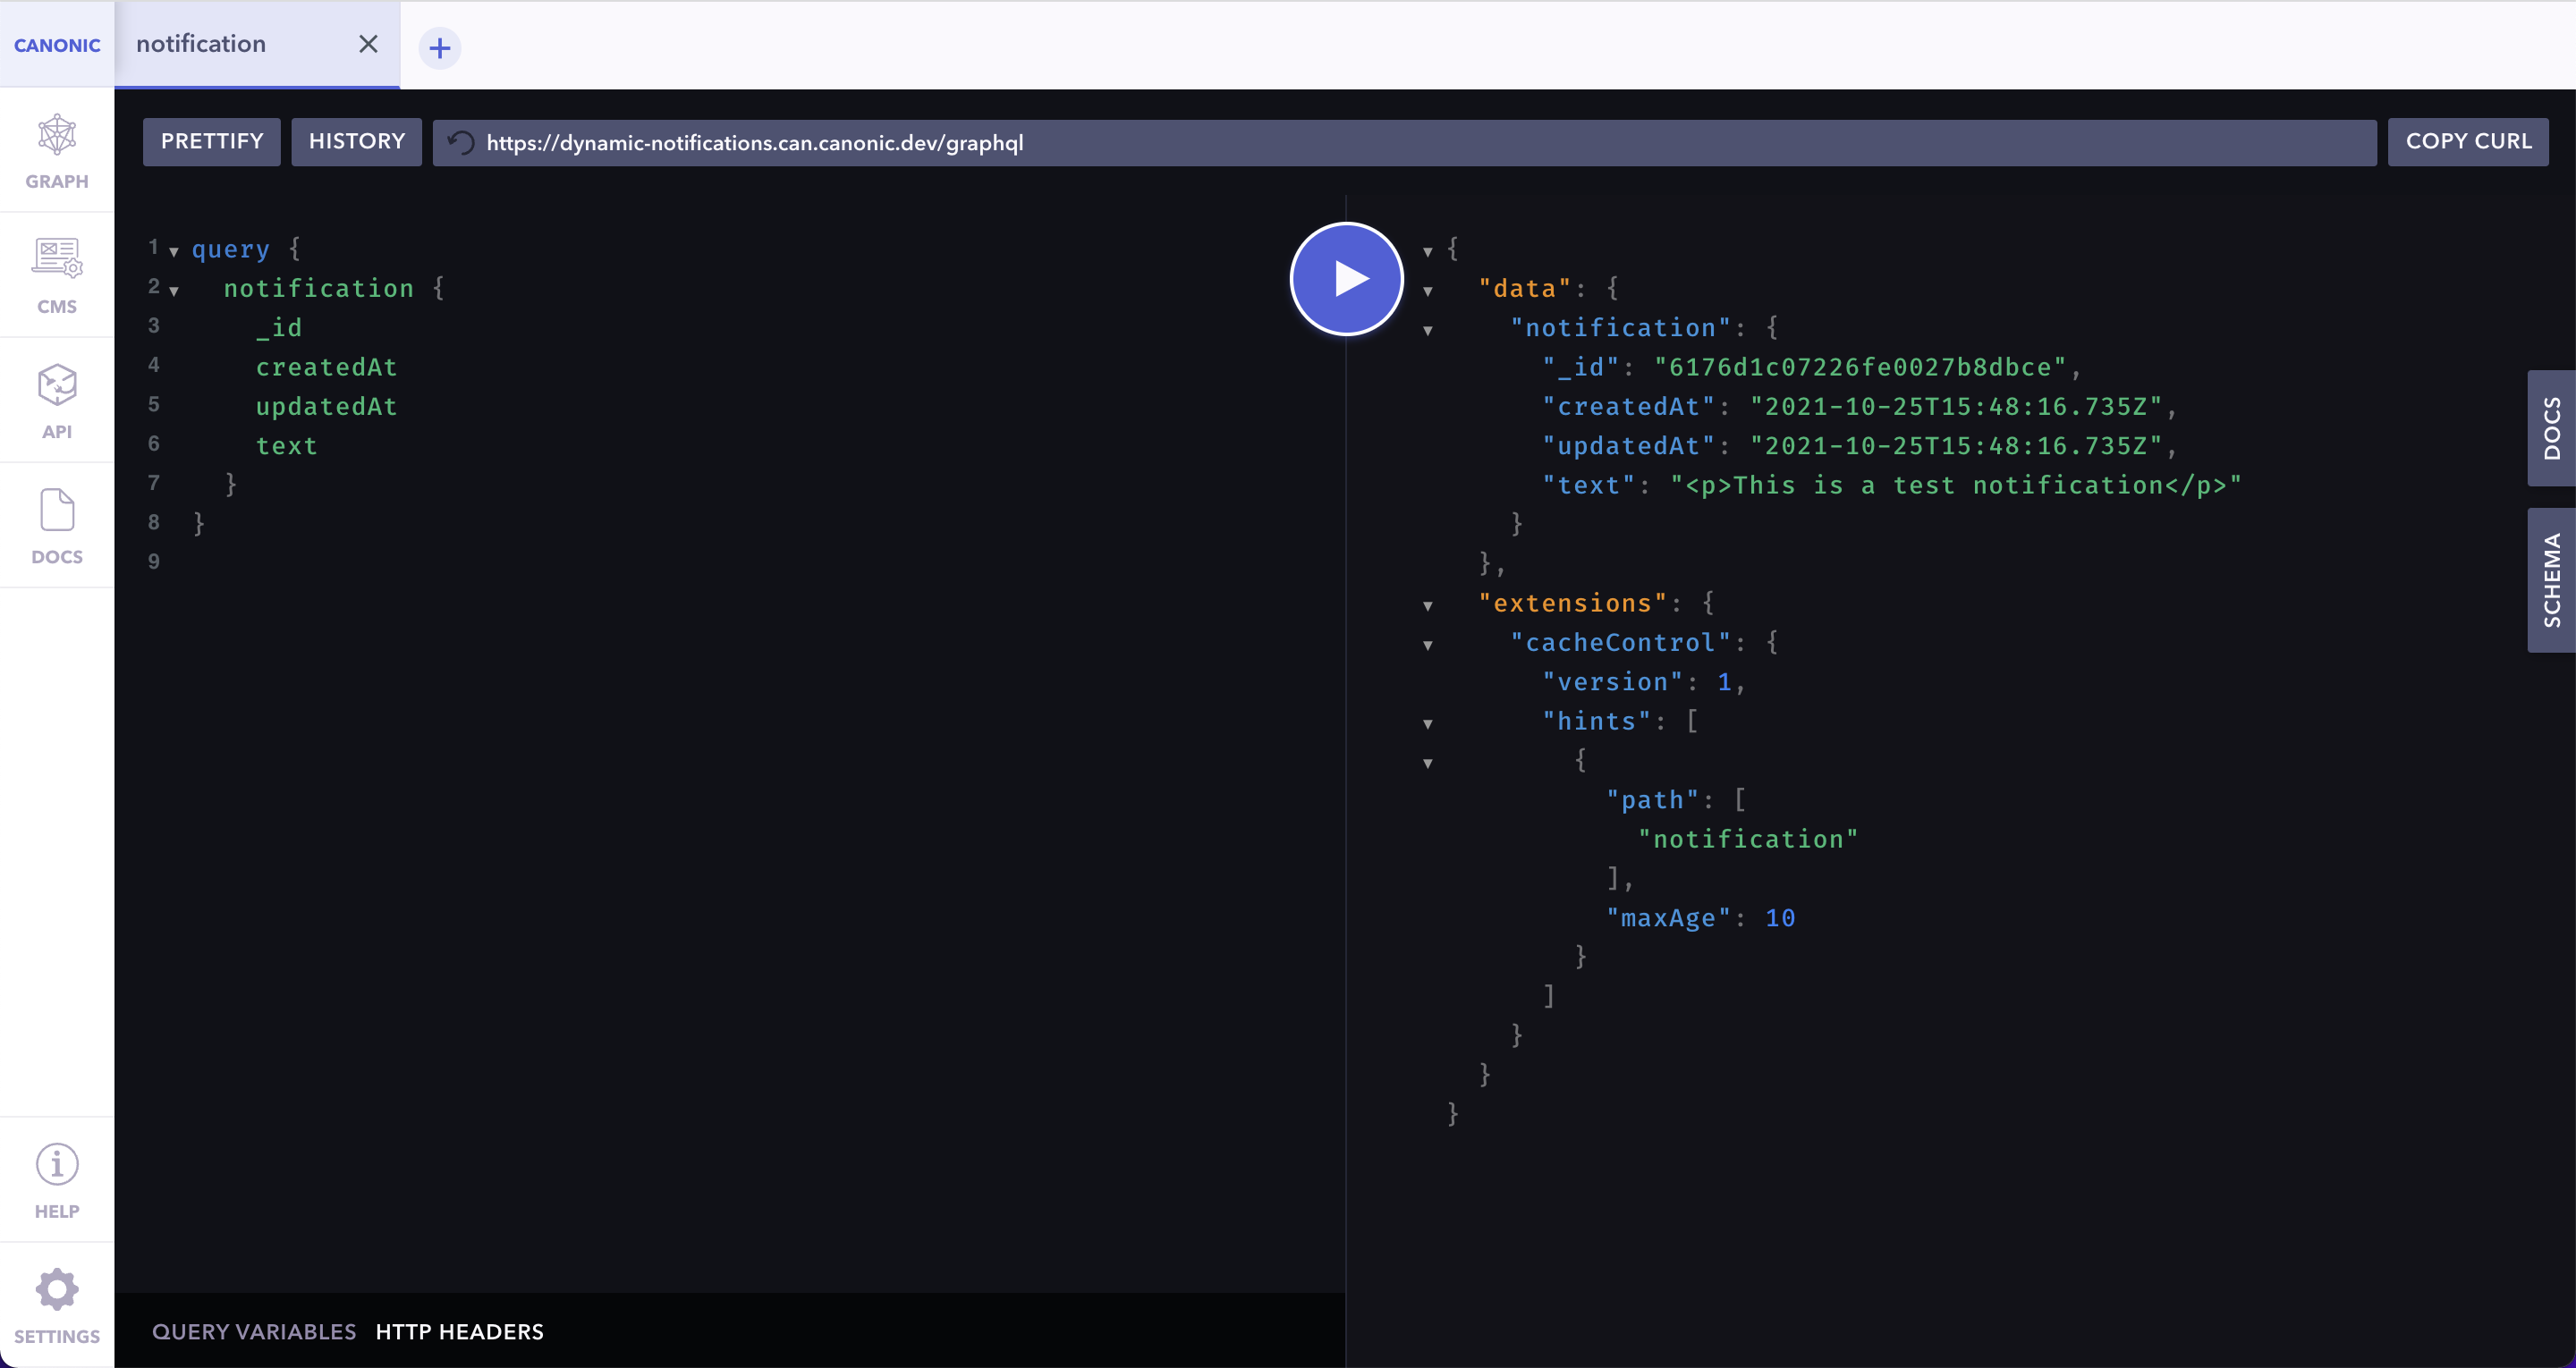
🧪Step 7: Let's test it!
In order to do the testing, navigate to the Docs section and select the newly created endpoint. Click Open In Playground and hit the play button. The data should now appear.
⚒Step 8: Time to integrate backend
We can easily integrate it by modifying App.js so that we fetch the data.
We'll use Axios to make the API call, install it using -npm install axios.
Make sure to replace "YOUR_API_URL_HERE" with the URL for your endpoint. You should be able to get that from the docs section....
import axios from "axios"
...
function App() {
const [notification, setNotification] = React.useState();
const getNotification = React.useCallback(
() =>
axios("YOUR_API_URL_HERE").then(({ data }) => data.data),
[]
);
React.useEffect(() => {
getNotification().then(setNotification);
}, [getNotification, setNotification]);
...
<div className="app">
{notification && (
<header
className="app-notification"
dangerouslySetInnerHTML={{ __html: notification.text }}
/>
)}
...
🔔Step 9: Refresh to get random notification
After the successful implementation of all the above states steps, you will get a random notification each time you refresh.


🎉 Voila!
You have successfully made your one dynamic prompt. 💃🕺
Check out the live demo here and sample code on Github here.
Conclusion
Hope this guide helps you. You can also check out our other guides here.
Join us on discord to discuss or share with our community. Write to us for any support requests at support@canonic.dev.

Integrations
Generate landing pages with OpenAI and other LLMs
In today's article, we'll be using OpenAI's ability to output JSONs to generate landing pages. Using...

Ajay Jarhad
Tue Aug 01 2023 • 6 min read

Integrations
How to integrate external API endpoints in AppGyver
With the advent of low-code/no-code platforms, building applications has become much easier. Let’s d...
Pratham Agrawal
Fri Apr 22 2022 • 6 min read

Integrations
Build Marketplace App with Stripe Billing
A marketplace app is much easier and faster than creating your own e-commerce website/app and then s...
Pratham Agrawal
Tue Mar 15 2022 • 14 min read
Enough said, let's start building
Start using canonic's fullstack solution to build internal tools for free